This is the third and final article in a short series on removing the effects of chromatic aberration (CA) from DSLR astroimages. This article describes a process for desaturating (i.e., "whitening") the halos around stars using the Select by Color Tool in GIMP. In addition, a technique for "shrinking" bloated stars will be discussed.
The Select by Color Tool in GIMP selects all pixels in the image that match a selected color within a given threshold. Since there are no naturally occurring astronomical objects that exclusively produce the hues present in CA halos, this tool is handy for selecting those colors for processing.
Open the image in GIMP and zoom in to one of the brighter stars, as in the image below.
- Select the "Select by Color Tool" by clicking the icon
 or by pressing Shift+O.
- Click the "Add to current selection" icon in the Tools tab (see the illustration below). It is important that this feature remain turned on during the selection process.
- Set the threshold. The threshold sets the sensitivity for selecting the colors. The higher the threshold the more colors will be selected. In other words, if the threshold is low and a particular hue of purple is clicked on in the image, then only pixels that are very close to that hue will be selected. A larger threshold will cause a wider range of brightness and hues to be selected. The exact method for selecting colors is determined by the "Select by" setting in the Tools tab. This is set to "Composite" by default.
- Click on the the pink, blue and purple halo colors around one of the stars. Start with the brighter parts of a halo and work to the fainter portions. You may need to select parts of the halos around other stars as well to get full coverage.
Zoom out occasionally to check the progress of your work. If too large of an area is selected, then press Ctrl+Z to undo the last selection(s). Adjust the threshold as needed to restrict the selected areas. Some of the fainter blue and purple colors may closely match the colors of parts of reflection nebulae, so the threshold may need to be lowered as you work your way into the fainter parts of the halos.
If you find that you cannot proceed selecting the fainter parts of the halos without selecting regions that you do not wish to modify, switch to the Fuzzy Select Tool (

) and select each of the remaining faint areas. Make sure that "Add to current selection" is selected in the Tools tab after switching to the Fuzzy Select Tool.
When you are finished selecting the halo colors, your result should look something like the following:
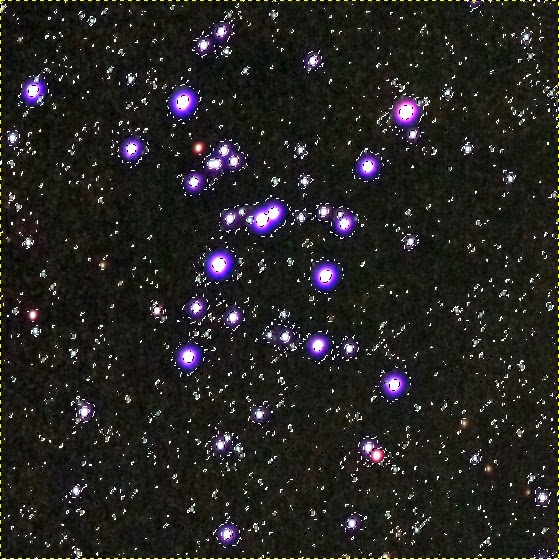 |
| Halos selected with Select by Color Tool. |
Click on Selection -> Feather... from the menu. Enter a feather value. I usually use 5px. Click OK.
In GIMP, feathering a selection graduates the transition between effects applied to the selected area and the surrounding image. This prevents harsh transitions that look unnatural.
Now, the final step! Select Colors -> Desaturate... from the menu, and select "Luminosity" from the radio button list:
Click OK, and then press Shift+Ctrl+A to remove the selection. Here is the final result:
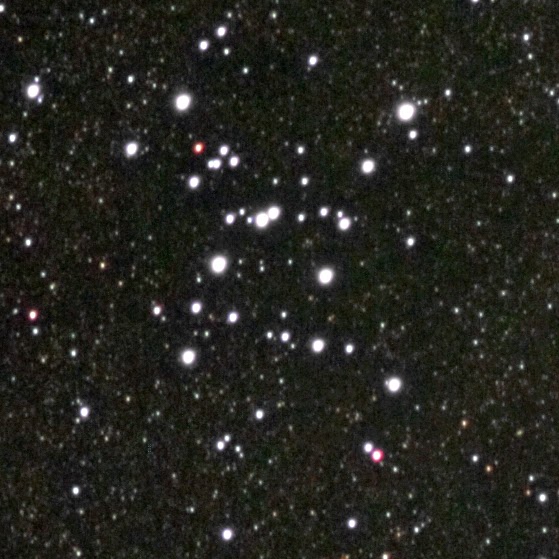 |
| Desaturated halos! |
The bloated stars may be reduced a bit using a value propagation filter. Immediately after applying the desaturation (while the selection is still active), select Filters -> Distorts -> Value Propagate... Select "More black (smaller value)" from the radio button list. The filter will shrink the bright portions of the selected area. The filter may be repeated by pressing Ctrl+F. Use this feature sparingly, though, as it distorts the image. I do not recommend using it on images of stars surrounded by nebulosity.
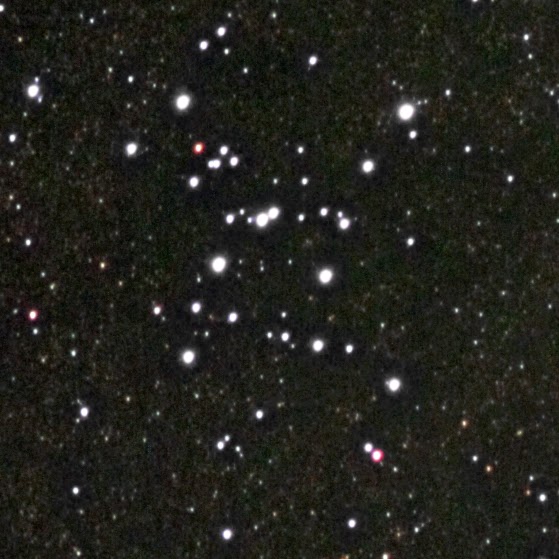 |
| A value propagate filter applied to reduce the size of the stars. |
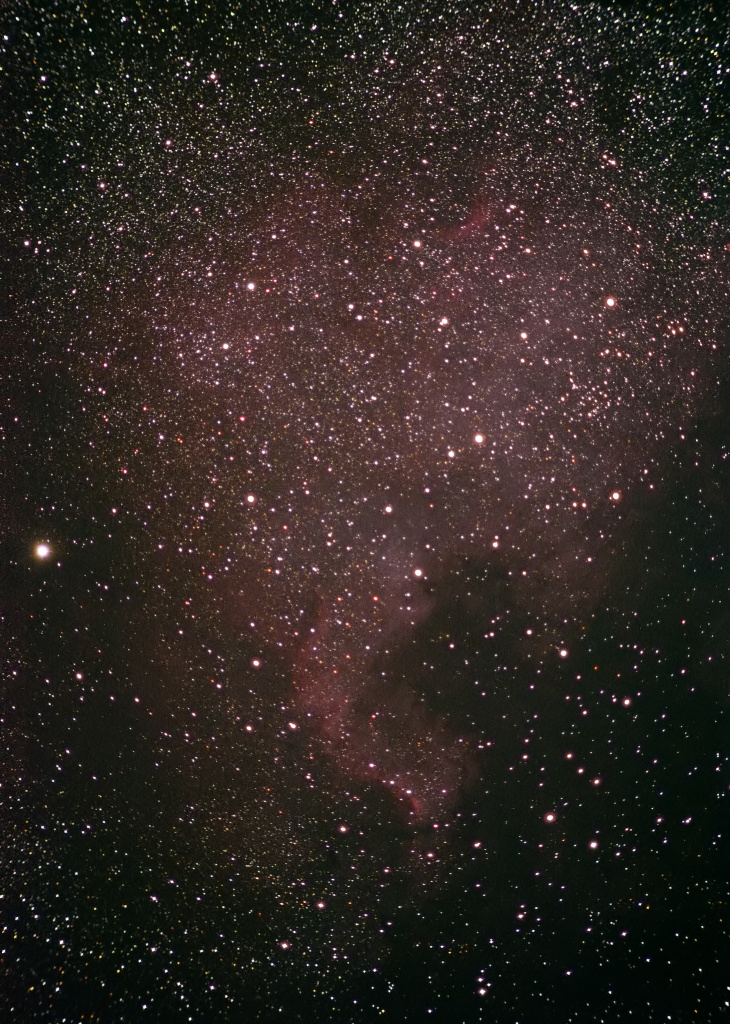
Applying the desaturation looks unnatural when the surrounding area is glowing red with Hydrogen-Alpha emissions. For example, examine this image from one of my posts on the
North America Nebula:
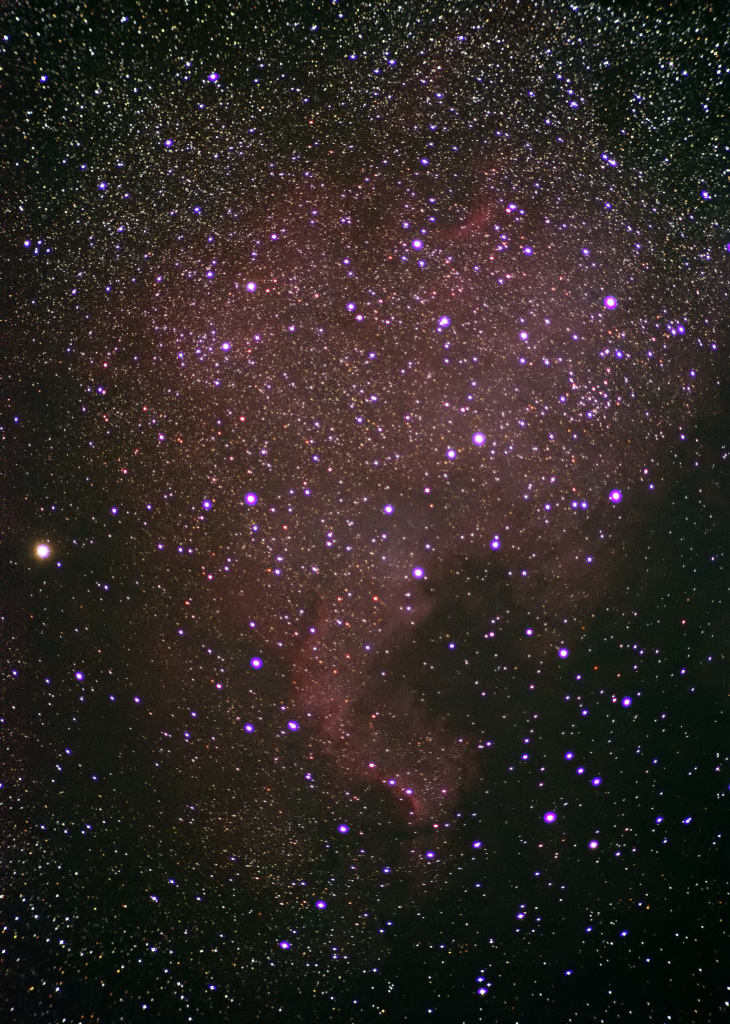 |
| North America Nebula (NGC 7000) with purple fringes around the stars. |
I found it difficult to remove the halos without creating unnaturally bleached "holes" in the nebula. I compromised by adjusting the hue of the halos to make them match the surrounding nebula using Colors -> Colorize... in GIMP, as discussed in
this post. Here is the final version:
 |
Colorized halos. The image could be improved by painstakingly manipulating the halo around each star to exactly match the color of the surrounding background nebulosity.
But who has time for that? |
I hope these articles provided some useful information on dealing with chromatic aberration in achromat astroimages. If you have any questions, please feel free to post them in the comments section below.


No comments:
Post a Comment