Sunday, March 27, 2011

Messier 24, the Sagittarius Star Cloud - Redo

The recent cloudy weather has driven me to go back into my archives and re-evaluate my older images. Here is a redo of Messier 24, the Sagittarius Star Cloud.

Messier 24, the Sagittarius Star Cloud; E-200; 20x120
This version of the image has been cropped to highlight the more interesting areas. The image file is rather large (just over 2 MB), so be warned if you try to view the full-size version.

I plan on re-imaging this object when I get the chance. I'm pretty sure that I can bring out more stars from the cloud, and more detail on the dark nebulae.

Incidentally, the background image that I am currently using for the blog is a low-res version of the image above.

Saturday, March 26, 2011

Messier 1, the Crab Nebula

The image below is a reprocessed version of the Crab Nebula that is posted on my web site.

I took five images of the Crab Nebula one night over a year ago, just to see what it would look like. My intention was to go back and do a proper imaging sequence when I had time. That time never came, and I have probably missed my opportunity to image it this year. As a consolation, I went back to the original five images and reprocessed them using the techniques that I have learned since creating the original.

Messier 1 (Crab Nebula), Epsilon-200 on NJP, 5x180
The Crab Nebula is probably the best known supernova remnant in the sky. Chinese astronomers noted the appearance of a "guest star" on July 4, 1054. The star was four times brighter than Venus, and visible in daylight for 23 days. It was visible to the naked eye at night for 653 days. A number of Native American groups also recorded the event in pictographs.

The debris cloud was discovered in 1731 by John Bevis. Charles Messier found it in 1758 (not realizing that it had been previously discovered), and mistook it for Halley's comet. He soon realized his mistake, and this prompted him to compile his famous catalog of fuzzy objects that are not comets--the Messier Catalog. Messier 1 gained is common name, Crab Nebula, based on a drawing made by Lord Rosse in 1844.

The true nature of the "guest star" was not revealed until the early 20th century, when astronomers compared the results of observations gathered over several years and found that the nebula was expanding. Calculations based partly on the rate of expansion revealed that the event that created the nova was the "guest star" observed by the Chinese in 1054.

Friday, March 18, 2011

HDR Image Processing - The Sword of Orion

The Sword of Orion is one of the most difficult deep space objects to process that I know. The problem is that some portions of the nebulae are very bright, while others are very dim. Bringing out the detail in the fainter portions overexposes the brighter areas, and toning down the brightness to reveal the detail in the brighter areas hides the darker ones. In photography, such an image is said to have a high dynamic range.

High dynamic range (HDR) photography is an art in itself. There are many tools and techniques for processing HDR images. This article lists the steps that I follow for processing some HDR astroimages in GIMP.

Here is the short version of the process:
  1. Take groups of images at different shutter speeds (e.g., groups of 1-second, 5-second, and 10-second exposures).
  2. Stack each group of images to create "master" images that represent each shutter speed. (For example, stack all of the 1-second exposures together to create a master 1-second image.)
  3. Load the individual master images as layers into a single image in GIMP, with the shortest exposure time at the bottom, progressing to the longest at the top.
  4. Align the layers using the stars on each image.
  5. Select overexposed areas in each layer, feather the selection, invert it, and then create a layer mask to bring out detail from the lower layers.
  6. Flatten the image.
The only difficult part of the process is in deciding on the shutter speeds. Experiment with different exposure times and choose those that overlap without losing image detail. My suggestion is to use more exposure times than you will probably need. It is better to have groups of images that you end up discarding than to have too great a gap in the dynamic range for the process to work.

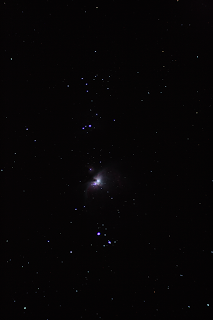
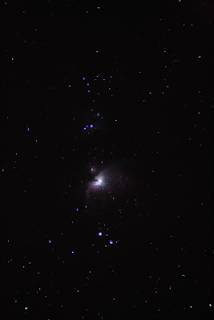
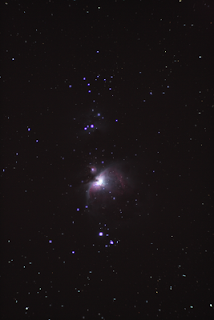
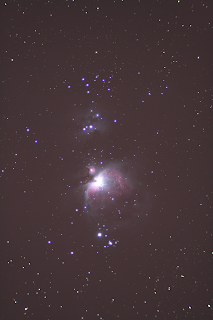
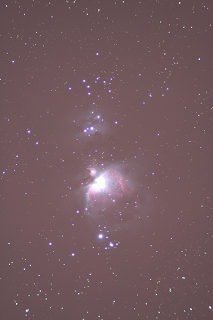
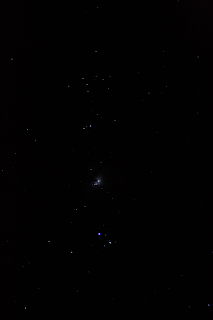
Below are copies of the master images that I used for the Sword of Orion. You may use them to experiment with. The original images are very large files, so these have been reduced to save space and bandwidth. All images were taken at ISO-1600 on my Canon EOS Rebel XS DSLR using the Orion ShortTube 80.
1 second

5 seconds

10 seconds

20 seconds

60 seconds

120 seconds
Note how the brighter areas become progressively more washed out as the exposure times increase.

I selected these shutter speeds based on trial and error. My mount does not have the ability to autoguide, so the longest exposure time I can usually hope for is around 3 minutes. A 3-minute test exposure did not reveal any more detail than the 2-minute exposures, so I chose 2 minutes as my maximum. Your mileage may vary...

Each master image must be aligned with the others. This can sometimes be done with a plug-in, such as the alignment "filter" in Georg Hennig's Gimp Astronomy Plugins. I have had only limited success with this, though, so I prefer to align images manually.

To manually align the images, load the shortest exposure into GIMP, and then load each successively longer exposure as a layer. The image with the longest exposure time should be the top layer. Starting with the top layer:

1. Set the layer opacity to about 50% to allow the layer below to show through a bit.
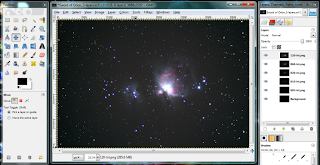
Load all master images as layers in a single image.
2. Select the layer below from the Layers palette and use the Move Tool to move the selected layer to line up the stars. You can use the keyboard arrows to move pixel-by-pixel, if needed.
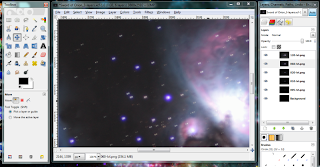
Use the Move Tool to line up the stars.
 3. When the two layers are lined up, set the opacity of the upper layer back to 100%, and then click the visibility icon (the "eye") on the Layers palette to hide that layer.

4. Repeat steps 1 through 3 for the next layer, and continue until all layers are aligned.

Next, create layer masks to bring details from the lower layers up through the overexposed sections of the upper layers:

1. Turn on the visibility for all layers and select the top layer.

2. Select the Fuzzy Select Tool from the Toolbox, and then set the Fuzzy Select Mode to Add to the current selection.
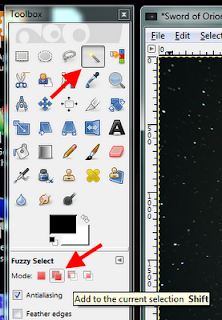
Fuzzy Select Tool and Fuzzy Select Mode.
3. Select the overexposed areas. The Threshold may be set in the Toolbox to allow the tool to select larger or smaller areas.
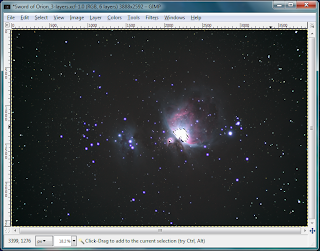
Select the overexposed areas on the selected layer.
4. Select Feather... from the Select menu, and set the feathered area to a large value. For my image (the full-size version) I selected 120 pixels.  The exact value will depend on the size of your image and the size of the overexposed areas. In general, the shorter the shutter speed the smaller the area that needs to be feathered. Experiment with different values to see what works best for you.

5. Select Invert from the Select menu.

6. From the Layer menu, select Mask and then Add Layer Mask... Click Selection from the Initialize Layer Mask to list, and then click Add. Part of the layer beneath will show through into the selected layer. The feathering from step 4 creates a gradual transition between the images. If the transition appears unnatural, then undo everything back to step 4 and try a different feather value.
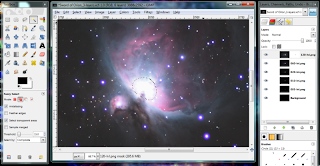
First layer mask on feathered selection.
7. Select None from the Select menu to clear the selected area.

8. Turn off the visibility on the current layer, then repeat steps 3 through 8 for the next layer.  Continue until all layers have been processed. No processing is needed for the lowest (background) layer.
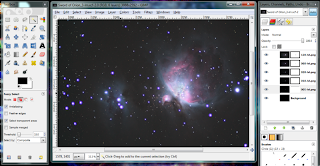
All layer masks created.
9. Once you are satisfied with the image, select Flatten Image from the Image menu to combine all of the layers into a single layer.

I do most of the rest of my image processing after merging the layers. Experiment with different processing sequences to determine whether some steps are better performed before or after merging.

This is by no means the only way to process HDR astroimages. I have found, however, that it is easy to do and produces good results; and, you can't beat the price of GIMP!

Tuesday, March 15, 2011

Waxing Moon, March 14, 2011

 
The Moon, March 14, 2011; ST80 on Vixen SP
60 images, ISO-200, 1/800 second exposure

Sunday, March 13, 2011

Messier 35

I set up the mount and scope the other night to experiment with the alignment. Everything went faster than I expected, so I had time to do a little imaging. I got to wondering how how Messier 35 would turn out with the ST80.

Messier 35, ST80 on Vixen SP, 16x120

The smaller cluster to the lower-left is NGC 2158. It is much further away than M35.

Here is my previous attempt at M35, taken with the Epsilon-200:

Messier 35, Epsilon-200

Messier 101, the Northern Pinwheel

Messier 101 is a large galaxy in the constellation Ursa Major. It is about 25 million light years distant, and about 170,000 light years across. Despite being fairly large in our sky (about 2/3 the size of the full moon), it is extremely faint. Small telescopes only reveal the brighter, central portion in dark skies. Either a telescope with a large aperture or a long-exposure image is required to discern the spiral structure.

Messier 101, ST80 on Vixen SP, 31x180
Also called the Northern Pinwheel, M101 is a grand design spiral, which means that it has clearly defined spiral arms radiating from its center.

The galaxy's distorted shape is likely due to gravitational interaction with its companion galaxies, particularly NGC 5474, seen to the lower right in this image. NGC 5474 is a dwarf spiral galaxy, which is a relatively rare galaxy type. Its core is offset in the direction of M101.

Focusing with a Bahtinov Mask

Polaris B asked in a recent post if I was using a Bahtinov mask for focusing. I'd never heard of such an animal until then, but after some research on the Internet I found that it is a very simple device to use. Basically, the mask is a pattern of slots that one places over the end of the scope. The slots produce a pattern of diffraction spikes around stars, one pair of which moves as the scope's focus is adjusted. The scope is in focus when this pair of spikes is centered in the pattern.

Bahtinov masks are available from various manufacturers and retailers. You may also generate your own mask using the astrojargon Bahtinov Focusing Mask Generator. One advantage to using the generator is that you can experiment with the parameters to tweak the performance of the mask.

I generated a mask for my ST80 using the default parameters, printed it on card stock, and cut out the slots with a hobby knife:

Bahtinov Mask printed on card stock.
I remove my scope's dew shield and fasten the mask in front of the objective lens using transparent tape. After polar aligning the mount, I swing the scope around to a bright star and view it through the live view mode of my DSLR camera.

The image below was taken while focusing on Sirius:

Sirius through the Bahtinov Mask.  At left, the image is out of focus.  At right, the star is in focus.
My new electronic focuser is capable of making fine adjustments, so centering the spike is relatively easy. When the star is in focus, I remove the mask, replace the dew shield, and everything is ready to go! The whole process takes only a couple of minutes, which includes the time that it takes to manually point the scope at the star. That's a big time saver over my old method, which would take up to half an hour and didn't always yield satisfactory results.

Despite the mask's ease of use, though, I still cannot see the monkey.